Insulated siding for better insulation offers a compelling solution for homeowners seeking enhanced energy efficiency and reduced environmental impact. This approach combines the aesthetic appeal of traditional siding with the performance benefits of integrated insulation, leading to significant cost savings and improved comfort. We’ll explore the various types of insulated siding, their installation, cost-effectiveness, and long-term advantages, providing a comprehensive guide to making an informed decision.
This detailed exploration will cover the diverse range of insulated siding materials available, comparing their performance characteristics, installation methods, and long-term maintenance requirements. We will delve into the energy savings achievable through the use of insulated siding, examining its impact on heating and cooling costs across different climates and dwelling sizes. Further, we will analyze the cost-effectiveness of this approach, including a return-on-investment assessment and a discussion of the environmental implications of choosing insulated siding.
Types of Insulated Siding
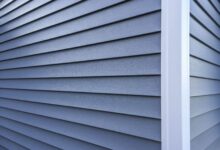
Choosing the right insulated siding can significantly impact your home’s energy efficiency and curb appeal. Several materials offer varying levels of performance, cost, and maintenance requirements. Understanding these differences is crucial for making an informed decision.
Insulated Siding Material Comparison
The following table compares three common insulated siding materials: vinyl, fiber cement, and foam core. These materials offer different balances of cost, durability, and energy efficiency. R-value, a measure of thermal resistance, is a key factor in determining energy savings.
| Feature | Vinyl | Fiber Cement | Foam Core |
|---|---|---|---|
| R-Value | 2-4 | 4-6 (depending on thickness and foam core) | 5-10 (depending on foam type and thickness) |
| Cost (per square foot) | Low | Medium-High | Medium |
| Durability | Moderate (susceptible to impact damage) | High (resistant to fire, rot, and insects) | Moderate (susceptible to impact damage; UV degradation possible) |
| Maintenance | Low (occasional cleaning) | Low to Medium (periodic painting may be required) | Low (occasional cleaning) |
Insulated Siding Installation Methods
Installation methods vary depending on the siding material. Vinyl siding typically utilizes a horizontal overlapping system, attached to furring strips over existing sheathing. Fiber cement siding, often heavier, may require more robust fastening and specialized tools. Foam core siding usually involves attaching insulated panels directly to the wall, followed by a finishing layer of vinyl or other materials. Proper installation is crucial to ensure water resistance and thermal performance. Professional installation is recommended for all types, especially for fiber cement.
Cross-Section of Insulated Siding Types
The following descriptions illustrate the cross-section of each siding type. Imagine a visual representation where each layer is stacked vertically.
Vinyl Insulated Siding: This typically consists of a thin outer vinyl layer for aesthetics and weather protection, an insulating foam core (polystyrene or polyurethane), and a backing layer that provides structural support and often incorporates a moisture barrier.
Fiber Cement Insulated Siding: This usually comprises a fiber cement exterior layer for durability and fire resistance, a foam insulation core (polyisocyanurate or polyurethane), and a backing layer that helps with installation and provides further insulation.
Foam Core Insulated Siding: This features a thick layer of rigid foam insulation (polyisocyanurate or polyurethane) as the primary component, often with a protective facing of vinyl, aluminum, or other materials. This type may or may not have an additional backing layer depending on the manufacturer and intended application.
Energy Efficiency Benefits
Insulated siding offers significant advantages in reducing energy consumption compared to traditional siding materials. Its core benefit lies in its ability to create a thermal barrier, minimizing heat transfer between the interior and exterior of your home. This translates directly into lower energy bills and a more comfortable living environment year-round.
The effectiveness of insulated siding in reducing energy consumption stems from its construction. Unlike traditional siding, which relies solely on the underlying wall insulation for thermal protection, insulated siding incorporates a layer of insulating material, often foam, directly within its structure. This creates a more effective insulation system, reducing the amount of energy needed to heat your home in winter and cool it in summer.
Energy Savings Calculations
Predicting exact energy savings with insulated siding requires considering several factors, including climate, house size, existing insulation levels, and heating/cooling systems. However, we can illustrate potential savings with examples. Let’s consider a hypothetical 2,000 square foot home in two different climate zones: a moderate climate (e.g., the Pacific Northwest) and a more extreme climate (e.g., the Midwest).
In a moderate climate, installing insulated siding might reduce heating and cooling costs by 10-15%, potentially saving between $150 and $225 annually based on an average energy bill of $1500. This assumes existing insulation is adequate. In a more extreme climate, the savings could be considerably higher, potentially reaching 20-25%, leading to annual savings of $300-$375 on the same $1500 average bill. These are estimates and actual savings will vary. A professional energy audit can provide a more accurate prediction based on specific home characteristics.
Impact on Heating and Cooling Costs
The impact of insulated siding on heating and cooling costs is directly linked to its ability to reduce heat transfer. During winter, insulated siding minimizes heat loss from the interior of the home to the outside, reducing the workload on your heating system. This translates to less energy consumption and lower heating bills. Similarly, during summer, the siding acts as a barrier against external heat, reducing the strain on your air conditioning system and lowering your cooling costs. The overall effect is a more stable indoor temperature, leading to greater comfort and reduced reliance on energy-intensive heating and cooling systems. The extent of the cost reduction will depend on the specific characteristics of the home and the climate.
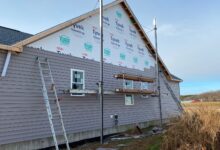
Installation Process and Considerations
Insulated siding installation, while achievable by DIY enthusiasts, often benefits from professional expertise, especially for larger projects or complex building designs. Proper installation is crucial for maximizing the energy efficiency and longevity of the siding, ensuring a return on investment and preventing costly future repairs. This section details the process, potential challenges, and the impact of proper technique.
The installation process typically follows a series of steps, requiring careful preparation and attention to detail. Failing to follow these steps can compromise the insulation’s effectiveness and lead to issues such as air leaks, moisture penetration, and premature siding failure.
Necessary Tools and Safety Precautions
Preparation is key for a successful installation. Gathering the necessary tools beforehand streamlines the process and minimizes interruptions. Equally important is prioritizing safety to prevent accidents and injuries.
Essential tools include measuring tapes, levels, saws (circular saw and hand saw for cutting siding), drills, impact drivers, safety glasses, work gloves, and appropriate personal protective equipment (PPE). Specialized tools such as a siding brake may also be necessary depending on the type of siding being installed. Safety precautions include wearing appropriate PPE at all times, using caution when operating power tools, and ensuring proper ventilation in confined spaces.
Step-by-Step Installation Guide
A typical installation begins with preparing the wall surface. This involves removing existing siding, repairing any damaged areas, and ensuring the surface is clean and dry. Next, the installation of furring strips or other fastening systems is crucial for creating a proper air gap behind the siding. This step is vital for maintaining the insulating properties.
- Surface Preparation: Remove existing siding, repair damaged areas (using appropriate patching materials and techniques), and clean the wall surface thoroughly. Ensure the surface is level and free of debris.
- Framing and Furring Strips: Install furring strips or other framing systems to create a ventilated air space behind the insulated siding. This helps to prevent moisture buildup and maintain the insulation’s R-value.
- Siding Installation: Begin installing the insulated siding panels, starting from a corner or a pre-determined starting point. Use appropriate fasteners and ensure proper alignment and overlap between panels. Follow the manufacturer’s instructions for specific panel types and installation techniques.
- Caulking and Sealing: Seal all gaps and joints between siding panels and around windows and doors with high-quality caulking to prevent air and moisture infiltration. This is essential for maintaining energy efficiency.
- Finishing Touches: Install any necessary trim, flashing, and accessories to complete the installation. Ensure all components are securely fastened and properly sealed.
Potential Challenges and Solutions
Several challenges can arise during installation. Understanding these potential problems and having solutions ready can significantly reduce delays and ensure a quality outcome.
Common challenges include uneven wall surfaces, difficult-to-access areas, and improper panel alignment. Uneven surfaces can be addressed by using shims or furring strips to create a level installation plane. Difficult-to-access areas may require specialized tools or techniques, and proper planning can help mitigate this challenge. Improper panel alignment can lead to aesthetic issues and compromise the siding’s performance; careful measurement and attention to detail are crucial to prevent this.
Impact of Proper Installation Techniques
Proper installation directly impacts the overall performance of the insulated siding. Accurate measurements, proper panel alignment, and meticulous sealing are crucial to maximize energy savings and extend the siding’s lifespan.
For example, gaps in the installation can lead to air infiltration, reducing the insulation’s effectiveness and increasing energy costs. Improper sealing can allow moisture penetration, leading to rot, mold, and premature siding failure. Conversely, a well-installed system will provide superior insulation, reducing energy bills and enhancing the home’s comfort. This results in a significant return on investment and increased property value.
Cost Analysis and Return on Investment
Insulated siding offers significant long-term benefits, but the initial investment can seem substantial. Understanding the cost breakdown and potential return on investment (ROI) is crucial for homeowners considering this upgrade. This section will provide a clearer picture of the financial aspects involved, allowing for informed decision-making.
Cost Breakdown for Insulated Siding Installation
Several factors contribute to the overall cost of insulated siding installation. These include the type of siding chosen, the size of the house, labor costs, and the need for permits. A realistic budget should encompass all these elements.
| Cost Component | Estimated Cost Range | Notes |
|---|---|---|
| Materials (Siding, Trim, Fasteners) | $5,000 – $15,000+ | Varies significantly based on siding type, quality, and house size. Higher-end materials like fiber cement or engineered wood will cost more than vinyl. |
| Labor | $5,000 – $15,000+ | Labor costs depend on the complexity of the job, the size of the house, and regional labor rates. More intricate installations will require more labor hours. |
| Permits and Inspections | $500 – $2,000 | Permit fees vary by location and the scope of the project. Inspections are necessary to ensure compliance with building codes. |
| Total Estimated Cost | $10,500 – $32,000+ | This is a broad estimate; a detailed quote from a contractor is essential. |
Long-Term Cost Savings and ROI
The long-term savings from reduced energy bills are the primary driver of ROI for insulated siding. The improved insulation reduces the amount of energy needed to heat and cool the home, leading to lower utility costs. The exact savings depend on factors like climate, existing insulation levels, and energy prices.
For example, a homeowner in a colder climate might see a reduction in heating costs of 15-25% annually. This translates to significant savings over the lifespan of the siding (typically 20-50 years).
To calculate the ROI, compare the total cost of installation to the cumulative savings in energy bills over a specific period (e.g., 10 years, 20 years). If the cumulative savings exceed the initial investment, the project shows a positive ROI. This calculation can be complex and should ideally be done with the assistance of a financial advisor or energy auditor.
Factors Influencing Return on Investment
Several factors can significantly influence the ROI of insulated siding. These include:
- Climate: Homeowners in climates with extreme temperatures (hot summers or cold winters) will generally see a greater return on investment due to higher energy savings.
- Existing Insulation: Homes with poor insulation will experience a more substantial improvement and higher savings compared to those already well-insulated.
- Energy Prices: Higher energy prices increase the value of energy savings, resulting in a faster ROI.
- Siding Type and Quality: Higher-quality, more energy-efficient siding will typically lead to greater long-term savings but comes with a higher upfront cost.
- Contractor Costs: Finding a reputable contractor who offers competitive pricing is essential for maximizing ROI.
Environmental Impact and Sustainability
Insulated siding offers significant environmental advantages beyond its energy-saving properties. By reducing energy consumption for heating and cooling, it contributes to a lower carbon footprint and minimizes reliance on fossil fuels. The choice of siding material, however, plays a crucial role in determining the overall environmental impact.
The environmental impact of insulated siding is multifaceted, encompassing material sourcing, manufacturing processes, transportation, installation, and eventual disposal or recycling. Different materials have varying impacts across these stages of their lifecycle. Careful consideration of these factors is essential for making environmentally responsible choices.
Comparison of Environmental Impacts of Different Insulated Siding Materials
Several factors influence the environmental footprint of various insulated siding materials. These include the embodied carbon (the greenhouse gas emissions associated with the material’s production and transportation), the energy required for manufacturing, and the recyclability or potential for reuse at the end of the siding’s lifespan. For instance, fiber cement siding generally has a lower embodied carbon footprint than vinyl siding, due to the use of natural materials and lower energy-intensive manufacturing processes. However, the manufacturing process for fiber cement often involves cement production, which itself has a significant carbon footprint. Similarly, while wood siding is a renewable resource, its sustainability depends heavily on responsible forestry practices. The use of recycled materials in the manufacturing process can significantly reduce the overall environmental impact. For example, some manufacturers incorporate recycled plastics into vinyl siding, minimizing the demand for virgin materials.
Recyclability and Sustainability of Insulated Siding Materials
The recyclability and sustainability of insulated siding vary greatly depending on the material. Vinyl siding, while widely used, is not readily recyclable in many regions, often ending up in landfills. However, advancements are being made in recycling technologies for vinyl, and some manufacturers are incorporating recycled content into new products. Fiber cement siding is typically not recyclable in the same way as other materials, although some components may be salvaged for reuse. Wood siding, being a natural material, is biodegradable and can decompose over time, but this process can be lengthy. However, reclaimed wood siding can be reused, reducing the demand for newly harvested timber. Aluminum siding, while highly recyclable, often requires significant energy to melt down and reprocess. The overall sustainability of a siding material also considers its lifespan and durability. A longer-lasting siding reduces the frequency of replacements, lowering the overall environmental impact over time. For example, a high-quality fiber cement siding with a 50-year lifespan will have a lower overall environmental impact than a vinyl siding requiring replacement every 15-20 years.
Maintenance and Longevity
Insulated siding, while offering significant long-term benefits, requires regular maintenance to ensure its durability and effectiveness. Proper care can significantly extend its lifespan and protect your home’s exterior. Neglecting maintenance can lead to premature deterioration and costly repairs. This section outlines a maintenance schedule and addresses common issues to help you keep your insulated siding in optimal condition.
The longevity of insulated siding is largely dependent on the material type and the climate it’s exposed to. For example, vinyl siding is generally more resistant to moisture damage than fiber cement, which may require more frequent inspections in high-humidity environments. Regular cleaning and prompt attention to any damage will be key factors in extending its lifespan, regardless of the material chosen.
Maintenance Schedule for Different Types of Insulated Siding
A regular maintenance schedule tailored to your specific siding type is crucial. This schedule outlines typical tasks, but always consult the manufacturer’s instructions for the most accurate guidance.
| Siding Type | Annual Maintenance | Bi-Annual Maintenance | As-Needed Maintenance |
|---|---|---|---|
| Vinyl | Washing with soap and water; inspection for cracks or damage. | Inspection of caulking around windows and doors. | Repairing cracks or holes; replacing damaged panels. |
| Fiber Cement | Washing with a pressure washer (low pressure); inspection for cracks or damage. | Inspection of paint condition; touch-up painting as needed. | Repairing cracks or holes; replacing damaged panels; repainting. |
| Polyurethane Foam | Inspection for signs of damage or deterioration; cleaning with a soft brush. | Inspection of sealant around joints and edges. | Repairing or replacing damaged sections; resealing joints. |
Common Issues with Insulated Siding and Repair Methods
Understanding common problems and their solutions is essential for proactive maintenance. Early detection and repair can prevent minor issues from escalating into costly repairs.
- Cracks and Holes: Small cracks can often be repaired with caulk specifically designed for the siding material. Larger holes may require replacing the damaged panel.
- Loose or Damaged Panels: Loose panels can be re-secured using appropriate fasteners. Severely damaged panels should be replaced.
- Moisture Damage: Proper caulking and sealing around windows and doors is crucial to prevent water intrusion. Addressing any leaks promptly is vital to avoid mold and rot.
- Paint Issues (Fiber Cement): Regular inspection and touch-up painting will maintain the appearance and protect the siding from the elements. Peeling or blistering paint indicates a need for more extensive repair or repainting.
- Insect Infestation: Inspect for signs of insect activity, especially in warmer climates. Treatment may involve pesticides or replacement of infested sections.
Tips for Extending the Lifespan of Insulated Siding
Proactive measures can significantly extend the lifespan of your insulated siding. These practices focus on preventing damage and maintaining the integrity of the material.
- Regular Cleaning: Regular cleaning removes dirt, debris, and pollutants that can accelerate deterioration.
- Prompt Repair of Damage: Addressing minor issues promptly prevents them from becoming major problems.
- Proper Caulking and Sealing: Ensure proper sealing around windows, doors, and other penetrations to prevent water intrusion.
- Trimming Overhanging Branches: Prevent branches from scraping against the siding, causing scratches or damage.
- Careful Handling of Equipment: Avoid using sharp objects or equipment that could scratch or dent the siding.
Comparing Insulated Siding to Other Insulation Methods
Choosing the right insulation method for your home is crucial for energy efficiency and comfort. This section compares insulated siding with other popular options, focusing on cost-effectiveness, installation, and overall performance. Understanding these differences will help homeowners make informed decisions based on their specific needs and budget.
Insulated Siding, Spray Foam, and Fiberglass Batt Insulation: A Comparison
The following table provides a side-by-side comparison of insulated siding, spray foam insulation, and fiberglass batt insulation, highlighting their key characteristics. These three methods represent popular choices for home insulation, each with its own strengths and weaknesses.
| Feature | Insulated Siding | Spray Foam Insulation | Fiberglass Batt Insulation |
|---|---|---|---|
| Cost | Moderate to High (depending on material and installation) | High (material and labor intensive) | Low to Moderate (relatively inexpensive materials) |
| R-Value (Insulative Capacity) | Moderate (varies greatly depending on the specific product) | High (can achieve very high R-values) | Moderate (R-value depends on thickness of batt) |
| Installation | Relatively easy, often done by contractors; exterior application | Complex, requires specialized equipment and skilled labor; often requires complete interior access | Relatively easy for DIY; installed in wall cavities |
| Effectiveness | Effective for exterior wall insulation, improves aesthetics | Highly effective, creates an air-tight seal, reduces air infiltration | Effective when properly installed, but can leave gaps and air infiltration points |
| Longevity | Long lifespan, provided proper installation and maintenance | Very long lifespan, durable and resistant to moisture | Moderate lifespan, susceptible to settling and moisture damage |
| Maintenance | Minimal maintenance required | Low maintenance, but repairs can be costly | Minimal maintenance; however, issues may arise if moisture penetrates |
Advantages and Disadvantages of Each Insulation Method
Each insulation method offers unique advantages and disadvantages that must be considered. For example, spray foam’s high R-value and air-sealing capabilities make it exceptionally effective, but its high cost and complex installation can be deterrents. Conversely, fiberglass batts are inexpensive and relatively easy to install, but they may not provide the same level of insulation or air sealing as other methods. Insulated siding offers a balance, improving both aesthetics and insulation, but its R-value might be lower than spray foam. The best choice depends on individual priorities and budget constraints. A homeowner prioritizing energy efficiency might choose spray foam despite the higher cost, while a homeowner on a tighter budget might opt for fiberglass batts or insulated siding. A homeowner looking for a combination of energy efficiency and improved aesthetics might find insulated siding to be the most appealing option.
Last Recap
Ultimately, the decision to install insulated siding represents a significant investment in your home’s energy efficiency and longevity. By carefully considering the various types of insulated siding available, their installation processes, and their long-term costs and benefits, homeowners can make an informed choice that enhances both their comfort and their bottom line. The improved energy performance and reduced environmental impact make insulated siding a compelling option for modern home improvements.